To use DSPy, install it with pip install dspy, connect a model with dspy.configure(lm=dspy.LM("provider/model")), describe your task as a signature such as "question -> answer", and wrap that signature in a module like dspy.Predict, dspy.ChainOfThought or dspy.ReAct. Once the program works on a few inputs, you write a metric, gather a small set of examples, and run an optimizer such as BootstrapFewShot or GEPA, which rewrites the prompts and picks examples for you. You save the result as a small JSON file and load it in production. That is the whole loop: declare the task, measure it, let DSPy tune it.
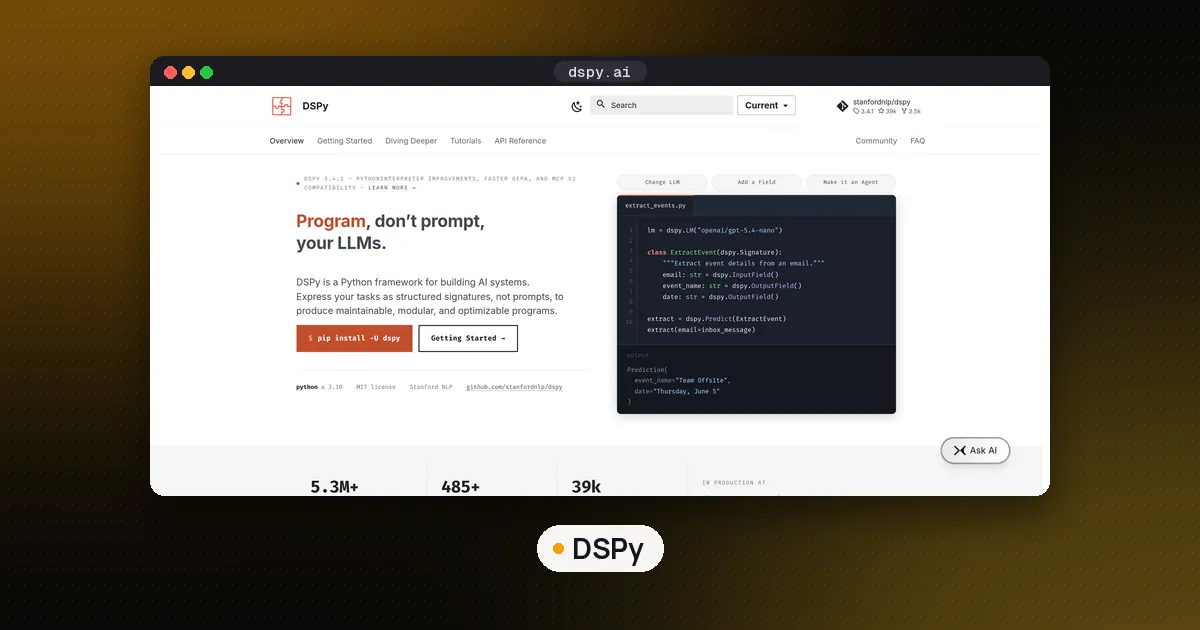
DSPy is an MIT licensed Python framework from Stanford NLP, published on PyPI as dspy. The latest release when we checked on November 9, 2026 was 3.4.1, from October 12, 2026, and it supports Python 3.10 up to 3.15. The GitHub repository had about 39,000 stars that day. Everything below was run on 3.4.1 unless we say otherwise.
What DSPy actually does differently
Most LLM code is a prompt string plus parsing. DSPy replaces the prompt string with a typed declaration of inputs and outputs, and it builds the prompt for you. That sounds small, but it changes what you maintain. You keep the task definition, the program logic and a metric in code. The exact wording sent to the model becomes an artifact that an optimizer can regenerate when you change models.
The project's own FAQ puts it this way: LangChain and LlamaIndex ship prebuilt application modules and prompts, while DSPy ships a small set of general modules that learn to prompt your model on your data. If you are happy with a generic prompt, a higher level library is faster. If you need a pipeline that holds up when you swap models, DSPy is built for that.
Step 1: Install DSPy and connect a model
Create a virtual environment and install the package:
python3 -m venv .venv && source .venv/bin/activate
pip install dspy
Then point DSPy at a model. The setup page uses "provider/model" strings:
import dspy

lm = dspy.LM("openai/gpt-5-nano", api_key="YOUR_OPENAI_API_KEY")
dspy.configure(lm=lm)
print(lm("What is the capital of France?"))
dspy.configure sets the default model for every program in the process. When one step needs a different model, wrap the call in with dspy.context(lm=other_lm): instead of reconfiguring globally. The same docs list Anthropic, Gemini, Azure OpenAI and Vertex routes, and any OpenAI compatible server works with api_base and api_key.
How to use DSPy with Ollama
For a local model, start Ollama, pull a model such as Llama 3.2 1B with ollama pull llama3.2:1b, and use the ollama_chat prefix:
dspy.configure(lm=dspy.LM("ollama_chat/llama3.2:1b"))Leave out api_key. In our test, DSPy 3.4.1 filled in the local address and a placeholder key on its own and sent the request to Ollama's OpenAI compatible endpoint at /v1/chat/completions on port 11434. When we passed api_key="", it failed before sending anything with an "empty credential" error, which is an easy trap if you copy older tutorials. Small local models follow DSPy's output format less reliably than large hosted ones, so expect more parse errors at 1B and test a 7B or 8B model before you judge the approach. Our guide on using LangChain with Ollama covers picking a local model and raising the context window.
Step 2: Write a signature and a module
A signature names the inputs and outputs. The quickest form is a string:
qa = dspy.Predict("question -> answer")
print(qa(question="What is the capital of France?").answer)
For real tasks, use a class. The docstring becomes the instruction and each field can carry a type and a description:
class Triage(dspy.Signature):
    """Classify a support ticket."""
    ticket: str = dspy.InputField()
    label: str = dspy.OutputField(desc="bug, billing or other")

triage = dspy.ChainOfThought(Triage)
result = triage(ticket="I was charged twice on my invoice")
print(result.reasoning, result.label)
dspy.Predict asks for the outputs directly. dspy.ChainOfThought adds a reasoning field before your outputs, so you get the model's working as a separate attribute. When we ran this class with a test model and read lm.history, the system message DSPy built started by listing the input field ticket, then the output fields reasoning and label (with our description attached), then a template using [[ ## field ## ]] markers. You never wrote that prompt, and you never parse it either: the result comes back as a Prediction object with named attributes.
To see what was sent in a real run, call dspy.inspect_history(n=1) after a call. Do this early. Most surprises with DSPy come from not looking at the prompt it generated.
Step 3: Add tools with ReAct
To build an agent, give dspy.ReAct a signature and plain Python functions. The function name, type hints and docstring become the tool description:
def get_weather(city: str) -> str:
    """Return the current weather for a city."""
    return f"sunny in {city}"

agent = dspy.ReAct("question -> answer", tools=[get_weather], max_iters=5)
out = agent(question="What is the weather in Austin?")
print(out.answer)
print(out.trajectory)
On 3.4.1, the loop asks the model for a thought, a tool name and tool arguments on each turn, runs the tool, and stops when the model picks the built in finish tool. In our test the trajectory came back as numbered keys: thought_0, tool_name_0, tool_args_0, observation_0, then the same for step 1. Log that trajectory in production. It is your trace of what the agent did.
Two notes. First, the ReAct reference on the docs site already describes DSPy 3.5, where the loop returns a history and a termination_reason and allows several tool calls per turn, with a default of 20 iterations. That version was not on PyPI when we checked, so code that reads trajectory may need a change when you upgrade. Second, dspy.Tool has from_langchain and from_mcp_tool helpers, so you can reuse tools you already wrote for LangChain or expose an MCP server's tools to a DSPy agent.
Step 4: Write a metric and evaluate
An optimizer can only improve what you can score. A metric is a Python function that takes an example and a prediction and returns a number or a boolean:
trainset = [
    dspy.Example(question="2+2?", answer="4").with_inputs("question"),
    dspy.Example(question="3+3?", answer="6").with_inputs("question"),
    dspy.Example(question="5+5?", answer="10").with_inputs("question"),
]

def exact_match(example, pred, trace=None):
    return example.answer == pred.answer

evaluate = dspy.Evaluate(devset=trainset, metric=exact_match, num_threads=4)
print(evaluate(qa))
with_inputs marks which fields go into the program; the rest are labels. In our run a program that got two of three right came back with a score of 66.67. For open ended outputs, the metric can itself call a model as a judge, but start with something exact if your task allows it. Keep a separate dev set that the optimizer never sees, or your score will flatter you.
Step 5: How to use DSPy to optimize a prompt
This is where DSPy earns its place. An optimizer runs your program over the training set, keeps what the metric rewards, and writes the winning instructions and examples into the program.
optimizer = dspy.BootstrapFewShot(metric=exact_match, max_bootstrapped_demos=4)
compiled = optimizer.compile(dspy.Predict("question -> answer"), trainset=trainset)
The main choices in 3.4.1:
| Optimizer | What it changes | Good first use |
|---|---|---|
LabeledFewShot | Adds your labeled examples as demos | A baseline with almost no cost |
BootstrapFewShot | Runs the program and keeps traces that pass the metric as demos | Small datasets, a first real optimization |
BootstrapFewShotWithRandomSearch | Tries several bootstrapped demo sets and keeps the best | When you can afford more calls |
MIPROv2 | Proposes new instructions and demos together, with auto set to light, medium or heavy | Larger sets where wording matters |
GEPA | Has a model reflect on failures and your metric's text feedback to rewrite instructions | Tasks where you can explain why an output failed |
BootstrapFinetune | Turns good traces into fine tuning data for the weights | When you control a model you can fine tune |
BootstrapFewShot is the right first step for most people. In our test with three examples and max_bootstrapped_demos=2, it kept two passing traces as demos. GEPA is the newer option the GEPA tutorial focuses on. Its metric can return dspy.Prediction(score=..., feedback="..."), and that text tells the reflection model what to fix. You pass it a reflection_lm, a separate model that writes the new instructions; the tutorial suggests a larger model when you are tuning a smaller one.
Optimization runs cost model calls. MIPROv2 and GEPA can make many of them, so try auto="light" first, set a budget on your provider account, and run on a small set before a large one. We did not measure call counts or gains ourselves, so check the docs for each optimizer's settings.
Step 6: Save, load and ship
Save only the learned state to JSON, then load it into a program you build the same way in code:
compiled.save("qa.json")

fresh = dspy.Predict("question -> answer")
fresh.load("qa.json")
The saving guide explains the two modes. A .json path stores instructions, demos and signature metadata, which is small and easy to diff in version control. save("dir/", save_program=True) pickles the whole module so dspy.load can rebuild it without your class definitions, but that directory contains executable code, so only load it from sources you trust. In our file, the lm entry was empty and the metadata recorded the Python and DSPy versions. Your model and keys are set again at load time, which is what lets you rerun the optimizer against a new model and compare.
Where DSPy fits next to agent frameworks
DSPy is good at making individual model calls reliable and measurable. It is lighter on the things agent runtimes handle: durable state across restarts, human approval steps, streaming user interfaces. Many teams use both. A LangGraph node can call a compiled DSPy module, and a LangChain tool can be wrapped for a DSPy agent with Tool.from_langchain. If you are still picking an orchestration layer, our best AI agent framework for Python comparison covers the options, and building an agent from scratch shows the loop that ReAct automates.
A sensible order for a new project: get one Predict working with inspect_history, write the metric, build 20 to 50 examples, run BootstrapFewShot, then try MIPROv2 or GEPA only if the score is still short of what you need.
FAQ
Is DSPy open source and free?
Yes. DSPy is released under the MIT license on GitHub and installs free from PyPI. You still pay for whatever model you call, unless you run a local model through Ollama.
How do I use DSPy with LangChain?
They work side by side rather than one inside the other. Use dspy.Tool.from_langchain to give a DSPy ReAct agent your existing LangChain tools, or call a compiled DSPy module from inside a LangChain or LangGraph step as an ordinary Python function.
Do I need training data to use DSPy?
Not to start. Predict, ChainOfThought and ReAct work with zero examples. You need a handful of examples and a metric only when you want an optimizer to tune the program, and BootstrapFewShot can work with a small set.
Which DSPy optimizer should I start with?
Start with BootstrapFewShot on a small training set. Move to MIPROv2 with auto="light" or to GEPA when you need instruction changes too, and keep a separate dev set to check the gain.
Why does DSPy fail with an empty credential error for Ollama?
In 3.4.1, passing api_key="" to an ollama_chat model raised that error in our test. Leave the key out and DSPy supplies a placeholder for the local server.